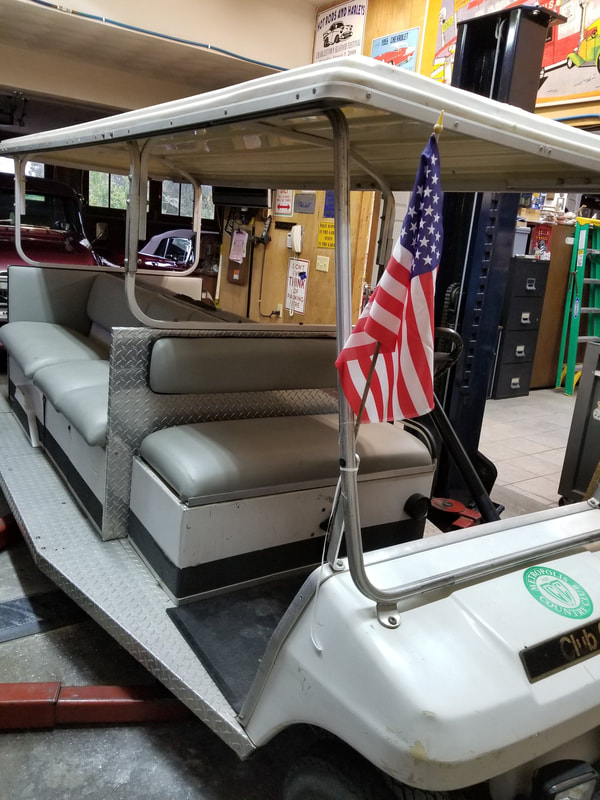
The 1995 Club Car Limo as received from Dave's neighbor.
It was late summer 2018, and my neighbor’s daughter came running over to tell me that the neighbor down the street was selling his limousine golf cart. I had always liked it when I saw it driving around the neighborhood, and Pat thought it would be great for going to the beach. I drove down the street in my 1969 Harley golf cart and stopped to look at the limo cart on their front yard. The owner, Al had always been interested in my car projects, so I asked if he was in town. The family was packing up the house as it had been sold. Al had suffered a minor injury and was still in NY, but his daughter and I were able to work out an amicable agreement, and a half hour later I was driving the cart home.
It needed a little mechanical work and I proceeded to do the necessary repairs to make it a good driver. At the WPRAACA Car Club picnic, Tom Link was surveying the Limo Golf Cart, and suggested that what it really needed was a VW chassis underneath instead of the Club Car drive train. Tom and I were talking casually about building a Rat Rod over the winter, and so we decided that merging a VW Beetle with the Limo would be a good undertaking.
We took a lot of measurements and looked up all the dimensions on a Beetle. It appeared that the 2 vehicles were close enough that we could pursue finding an air cooled VW Bug.
Limo golf cart dimensions VS VW Bug
Golf cart VW Bug
Rear Width – 65 inches 60.5 inches
Rear WB – 39 inches approximate 50.5 inches
Wheelbase Length – 105 inches 94.5 inches
Front WB – 33 inches approximate 50.5 inches
Vehicle OAL – 150 inches 160 inches
And so the search began for a suitable VW donor car. We wanted something that had a good pan. We were not overly concerned about the body condition, as we were not going to need the shell. We looked at a few on line and even made a full day trip to Vermont to look at a Type II station wagon. Tom, Dave Peterson and I towed my car trailer up and finally found the car. We found that the car was not as presented, and had to pass on the purchase and drive home with an empty trailer.
We located a BAHA project that someone had started, and wanted to sell, just before we went to Hershey. Over the week, I communicated with the seller and was able to set up an appointment to look at it when we returned. Tom & I inspected the 1967 Beetle and found the condition to be more than acceptable for the price. We brought it home, and the restoration work began.
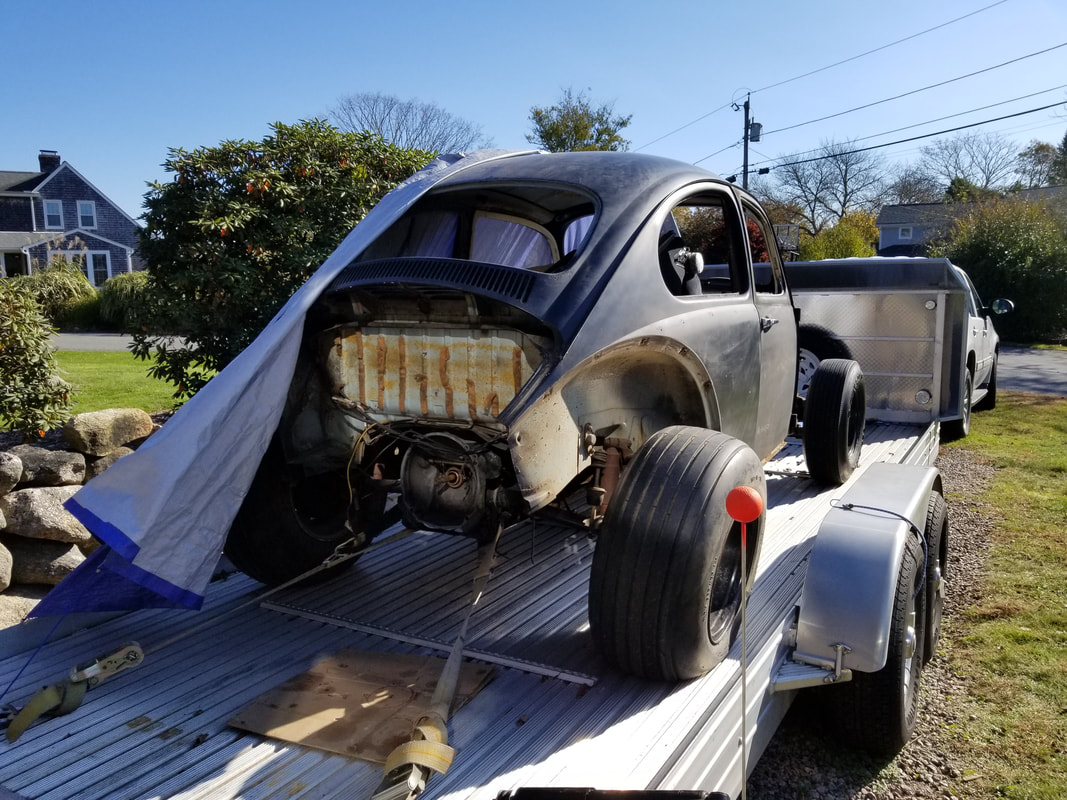
The 1967 VW Beetle as received. The body was in surprisingly nice condition.
The engine was out of the vehicle and a second core of an engine was provided. Research indicated that the partial engine was probably the original 1967 engine, and the complete engine was a 1963. The engine would not turn over when we started, so we went about slowly using all Tom’s Techniques to slowly get the engine to turn over. We were able to do a compression check, and three of the cylinders were pretty good, but the fourth only showed 20#. We purchased a bracket to start the engine on the bench, a new starter and proceeded to get the engine ready to start.
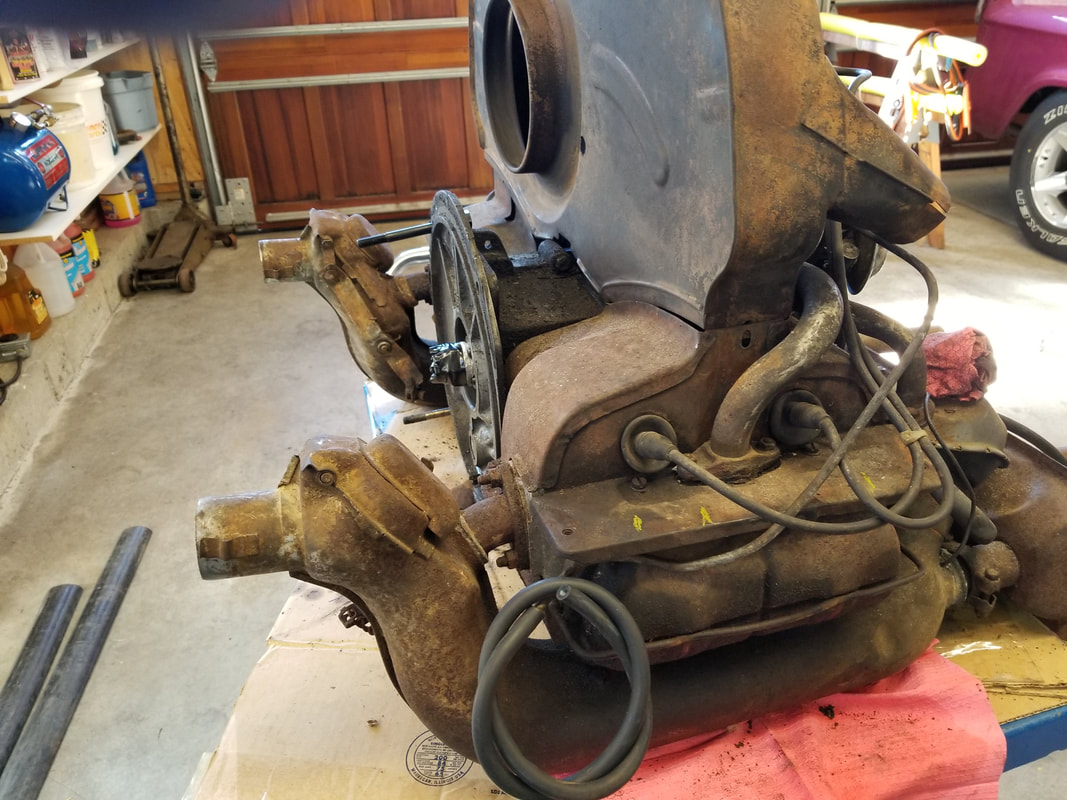
The VW engine before work began. This was later mounted on a bench and restored.
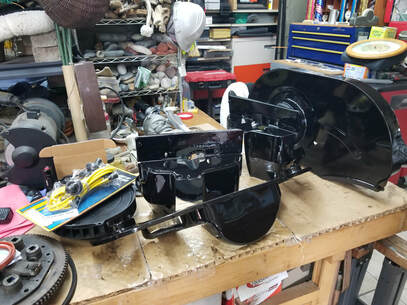 The VW engine in the process of being taken apart and restored.
 On the day we started the engine, it fired up fairly quickly, and we were sprayed with all the bedding material the mice had been using while living in the engine. Surprisingly, once all the stuff blew out the engine began to run pretty smoothly. We redid the compression check, and now all the cylinders were around 120#. After a few more trial runs, we decided the engine would be ok to run and started to tear it down, clean and repaint. We adjusted the valves, but did not remove the heads. New gaskets, clutch, and alternator were the final major components and the engine was ready.
Click on the above video to see the restored engine running on the test bench. This is a smooth VW! Dave and Tom performed a really expert restoration.
The next project was to remove the body and inspect the pan. We were pleasantly surprised to find that the pan was in better condition than we thought and only had a few pin hole rust spots in the Battery area. The rest of the pan was very solid, and we were able to sand, wire brush and paint the chassis and transaxle fairly easily.
At this point I started taking videos of the progress and the photos and videos that are included in this blog are pretty self-explanatory. The videos will show the progress I have described and the last few months of merging the vehicles together.
You can watch the entire video (20 minutes) by clicking on the first screen below. You can also watch just part of it and return later and pick up at any point by dragging the red button that appears on the video. If you want to view it full screen just click on the little TV screen icon in the lower right of the video.
If you liked this blog and the very cool video, please let Dave and Tom know that you appreciate their work by leaving some comments here. Just click on the little blue 'Comment' button that is below this text. It's easy!
 RSS Feed